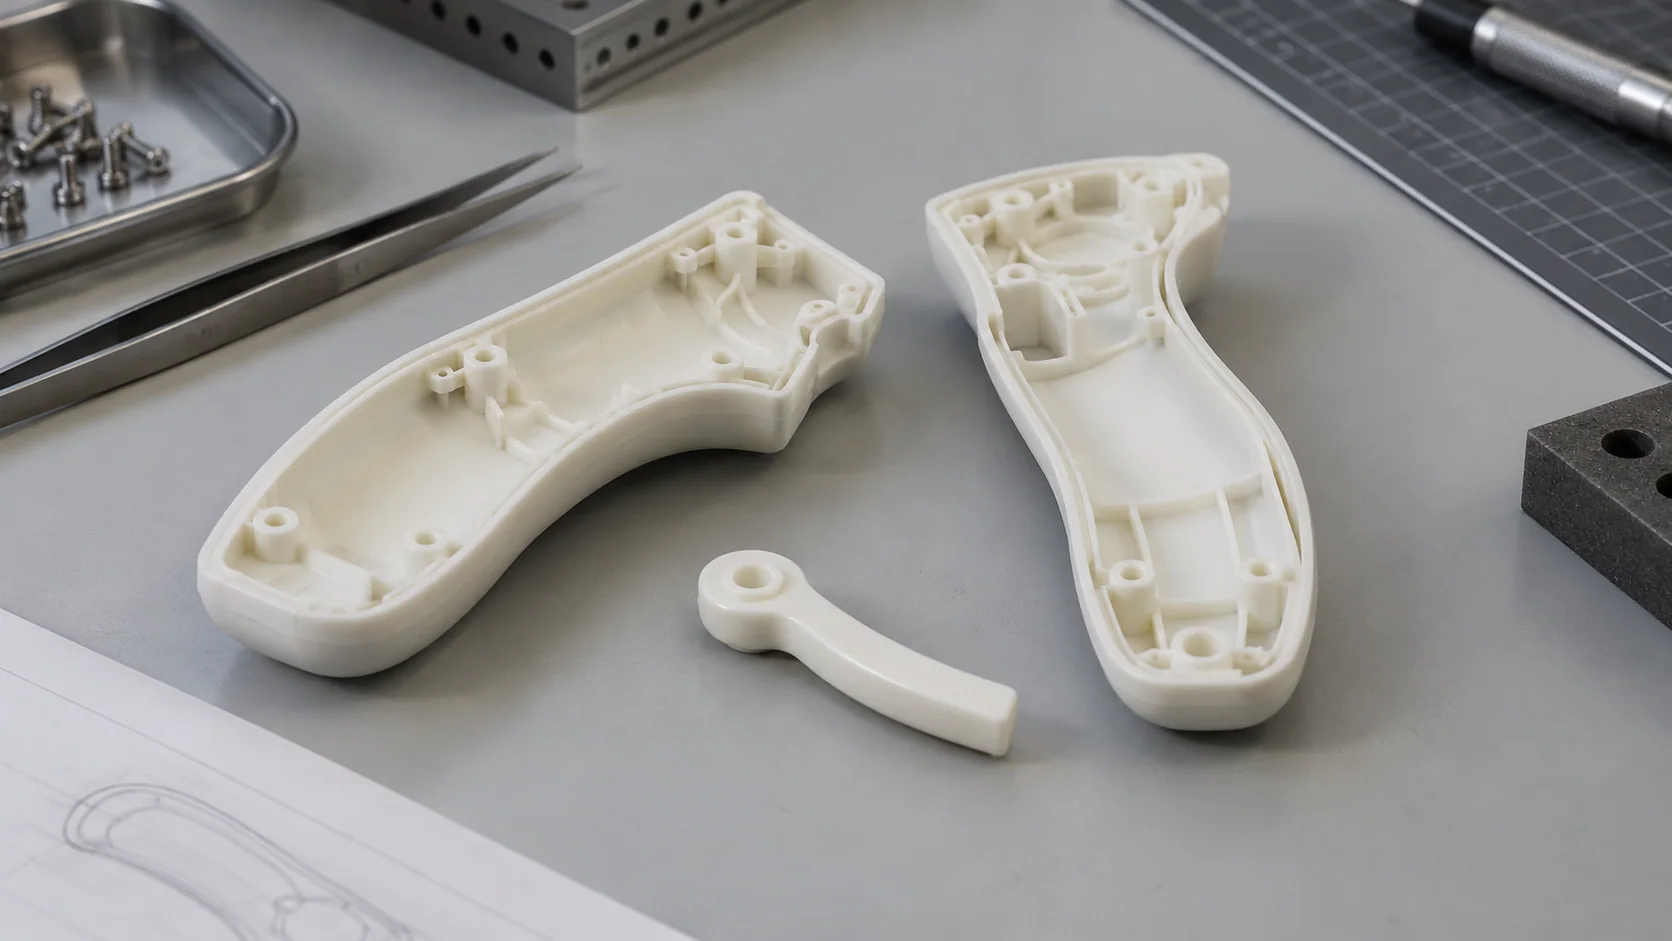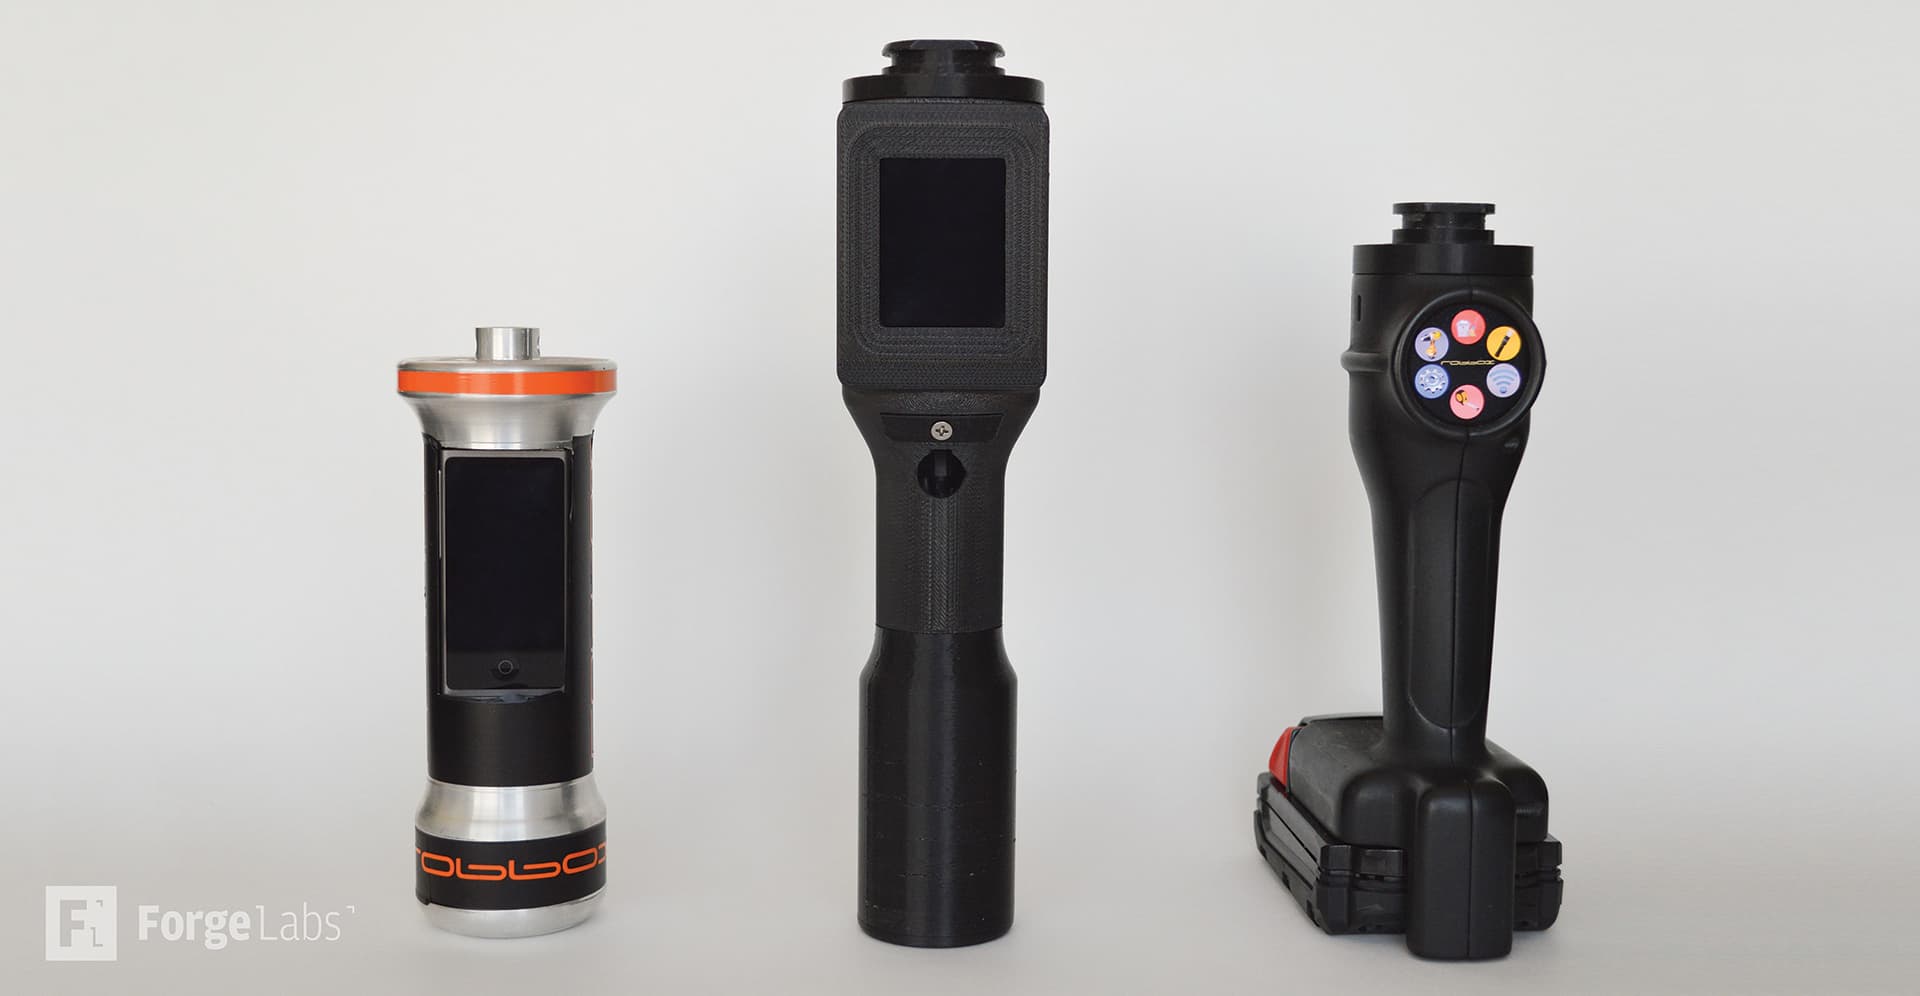
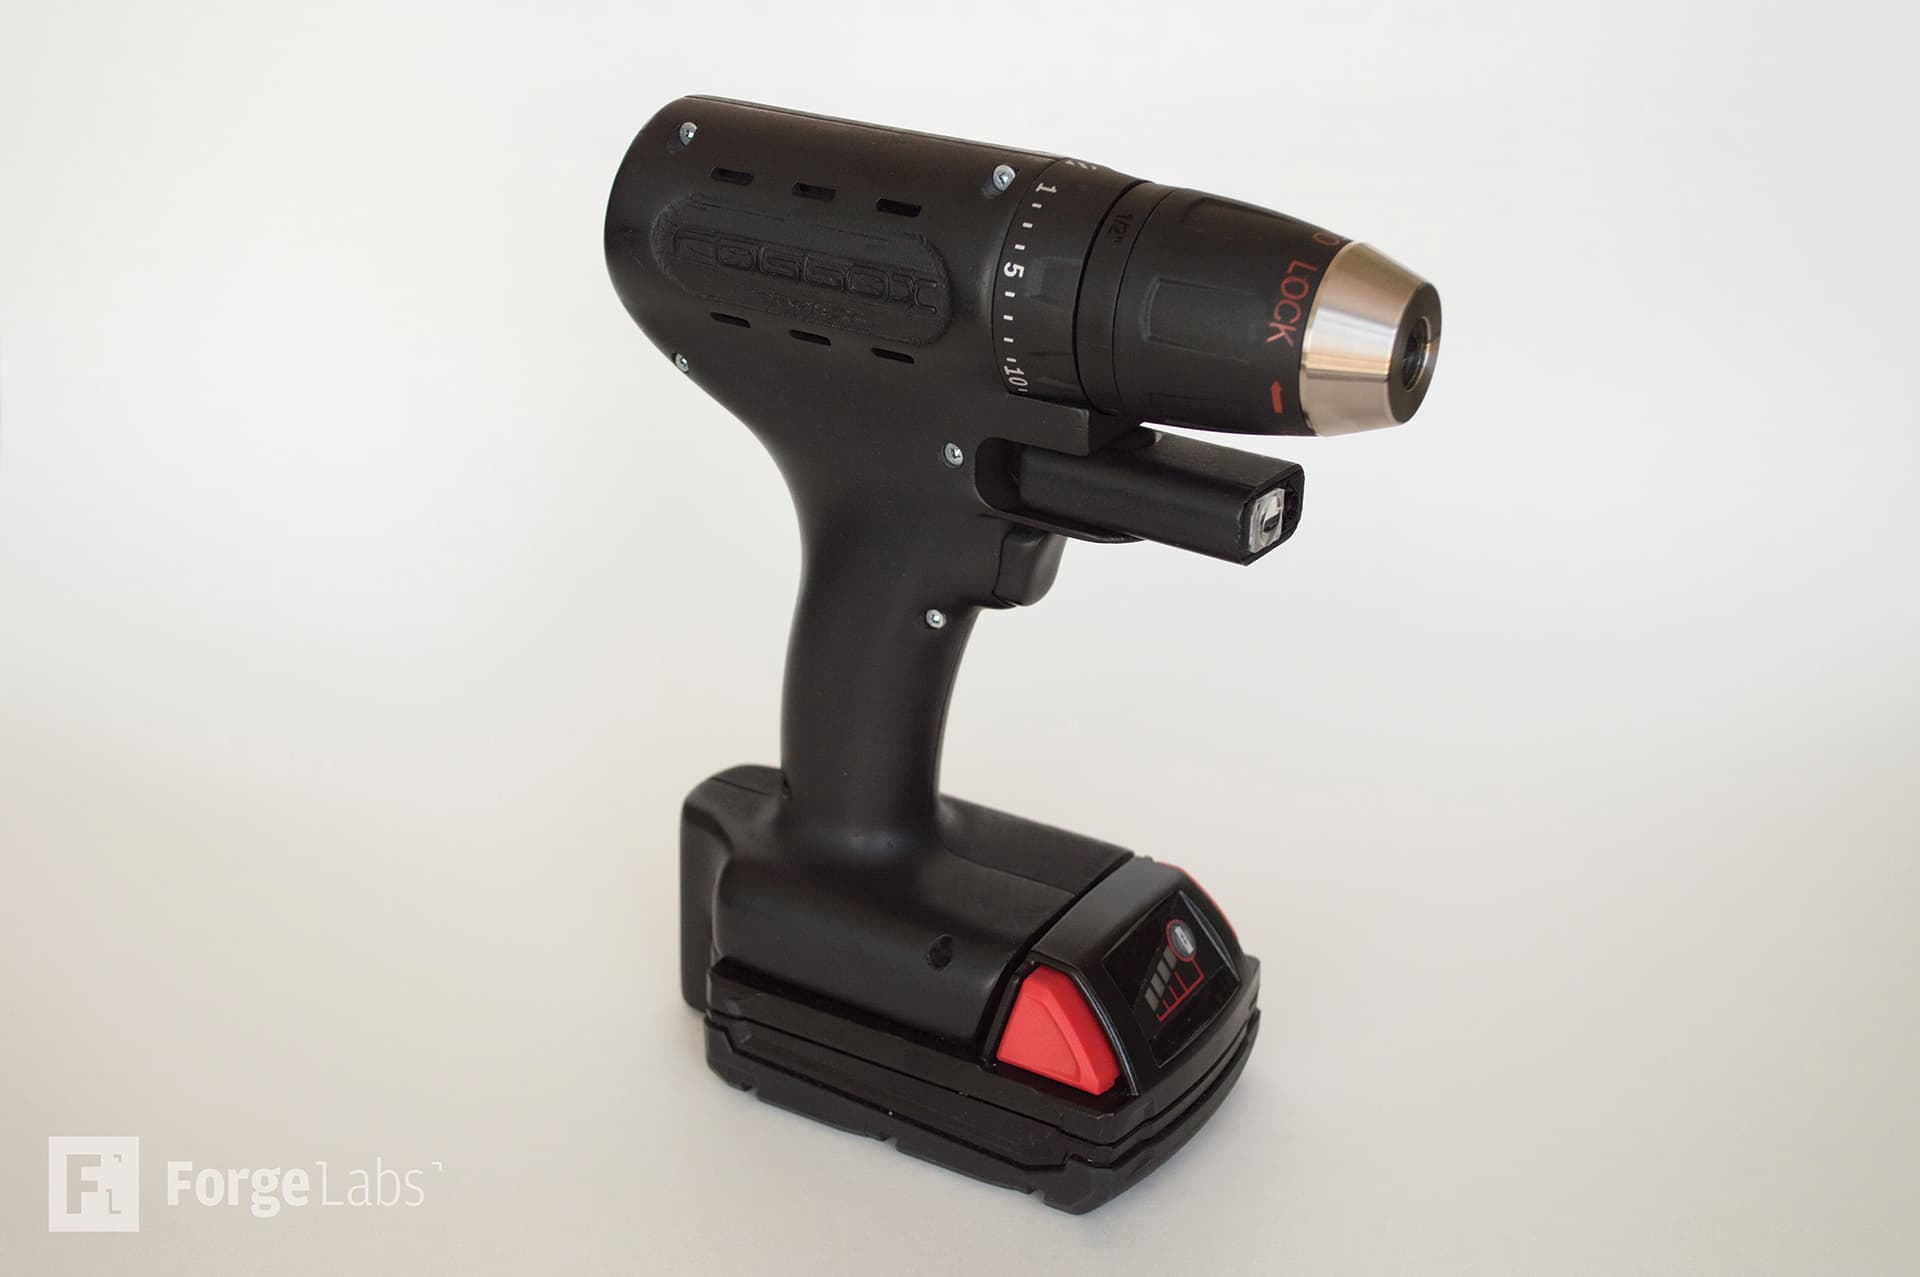
A power tool enclosure has to fit two things at once: the hardware inside and the hand holding it. Robbox used FDM prototypes to work through both while developing its smart drill, driver and interchangeable attachments.
Forge Labs helped manufacture the prototype enclosures in ASA and ABS. Printing gave the team physical parts to assemble, handle and revise as the electronics and outer shape evolved. Once a design was ready to present, the printed surfaces could be primed and painted for demonstrations. The same development approach supported practical fit checks and a convincing finished product appearance.
The Work at a Glance
- Parts: drill and driver enclosure prototypes, with interchangeable tool attachments
- Process and materials: FDM printing in ASA and ABS thermoplastics
- Design focus: grip, thin enclosure walls, electronics packaging and attachment fit
- Historical turnaround: two days for the enclosure examples; overnight printing for attachment iterations
- Result: functional development assemblies and finished demonstration prototypes before mould tooling
Make the Tool Work in the Hand
Robbox was developing tools that combined familiar handheld functions with sensors, electronics and feedback for the operator. Those additions placed more demands on the housing: the enclosure had to accommodate the components while remaining light and comfortable to hold. The drill needed thin walls, and the driver's shape changed as its electronics developed.
A full-size prototype makes those relationships tangible. With the intended hardware fitted, a team can feel the balance, reach the controls and judge how the tool sits in the palm. A grip that looks comfortable in CAD can feel too wide at one point or put a control just beyond easy reach. Printing another shell makes it practical to compare a revised contour with the previous version.
The inside deserves the same attention. Fastener access, wiring space and the way the enclosure closes all affect whether the design is easy to assemble. For a similar housing, the useful prototype includes its mating edges, component seats and fixing features. These details turn an outer shape into an assembly the team can learn from.
Build a Shell That Can Be Assembled and Refined
Fused Deposition Modeling (FDM) builds the enclosure directly from the CAD model in thermoplastic. The shell, internal ribs and mounting features can be produced together, and changes to their positions can go into the next print. That suits a product whose outer shape and internal layout are still being developed.
ABS provides a tough, rigid housing that can be handled and fitted around the working components. ASA offers similar practical benefits, along with resistance to sunlight that is useful for parts evaluated outdoors. Both can be sanded, primed and painted, allowing a development shell to progress into a presentation model when its geometry is settled.
Wall design helps keep that shell light without making it feel flimsy. A rib can stiffen a broad panel, while a rounded connection between a screw boss and the wall spreads the fastening load. These local features put material where it helps the assembly. Our FDM design guide starts supported walls at 1 mm; a handled enclosure also needs thickness and reinforcement suited to its span, grip loads and fixing points.
Build orientation matters because FDM forms the part in layers. We plan the orientation around the loaded features, visible surfaces and access for finishing. ASA and ABS can use soluble supports beneath overhangs and inside accessible recesses. After printing, removing those supports and cleaning the part opens up the enclosure for assembly. Considering this route early helps preserve the mating edges and small features that make a prototype useful.
IterationKeep Changes Affordable While the Design Is Moving
Robbox needed to revise its designs frequently. Printing kept each change tied to making another set of parts, so the team could continue refining the grip and electronics layout before investing in mould tooling. The Robbox team described development moving ten times faster with FDM prototypes, allowing several products to approach completion within a year.
“3D printing saves an enormous amount of time and money.”
Andy Matei, Robbox Founder & President
The original project account described prototype costs 50–100 times lower. Its two enclosure examples show the scale of the tooling expense avoided during development:
| Prototype | FDM | Moulded alternative |
|---|---|---|
| Drill enclosure | $2002 days | $10,0002–6 weeks |
| Driver enclosure | $1502 days | $10,0002–6 weeks |
The benefit compounds when a physical check reveals a change worth making. Moving a mounting point, adjusting a grip or opening up an assembly clearance can be carried into another print. A useful iteration therefore starts with a clear question: does this version fit the electronics, assemble more easily or feel better in use? That focus keeps the next prototype connected to a decision.
Modular AttachmentsRefine the Connection as Well as the Tool
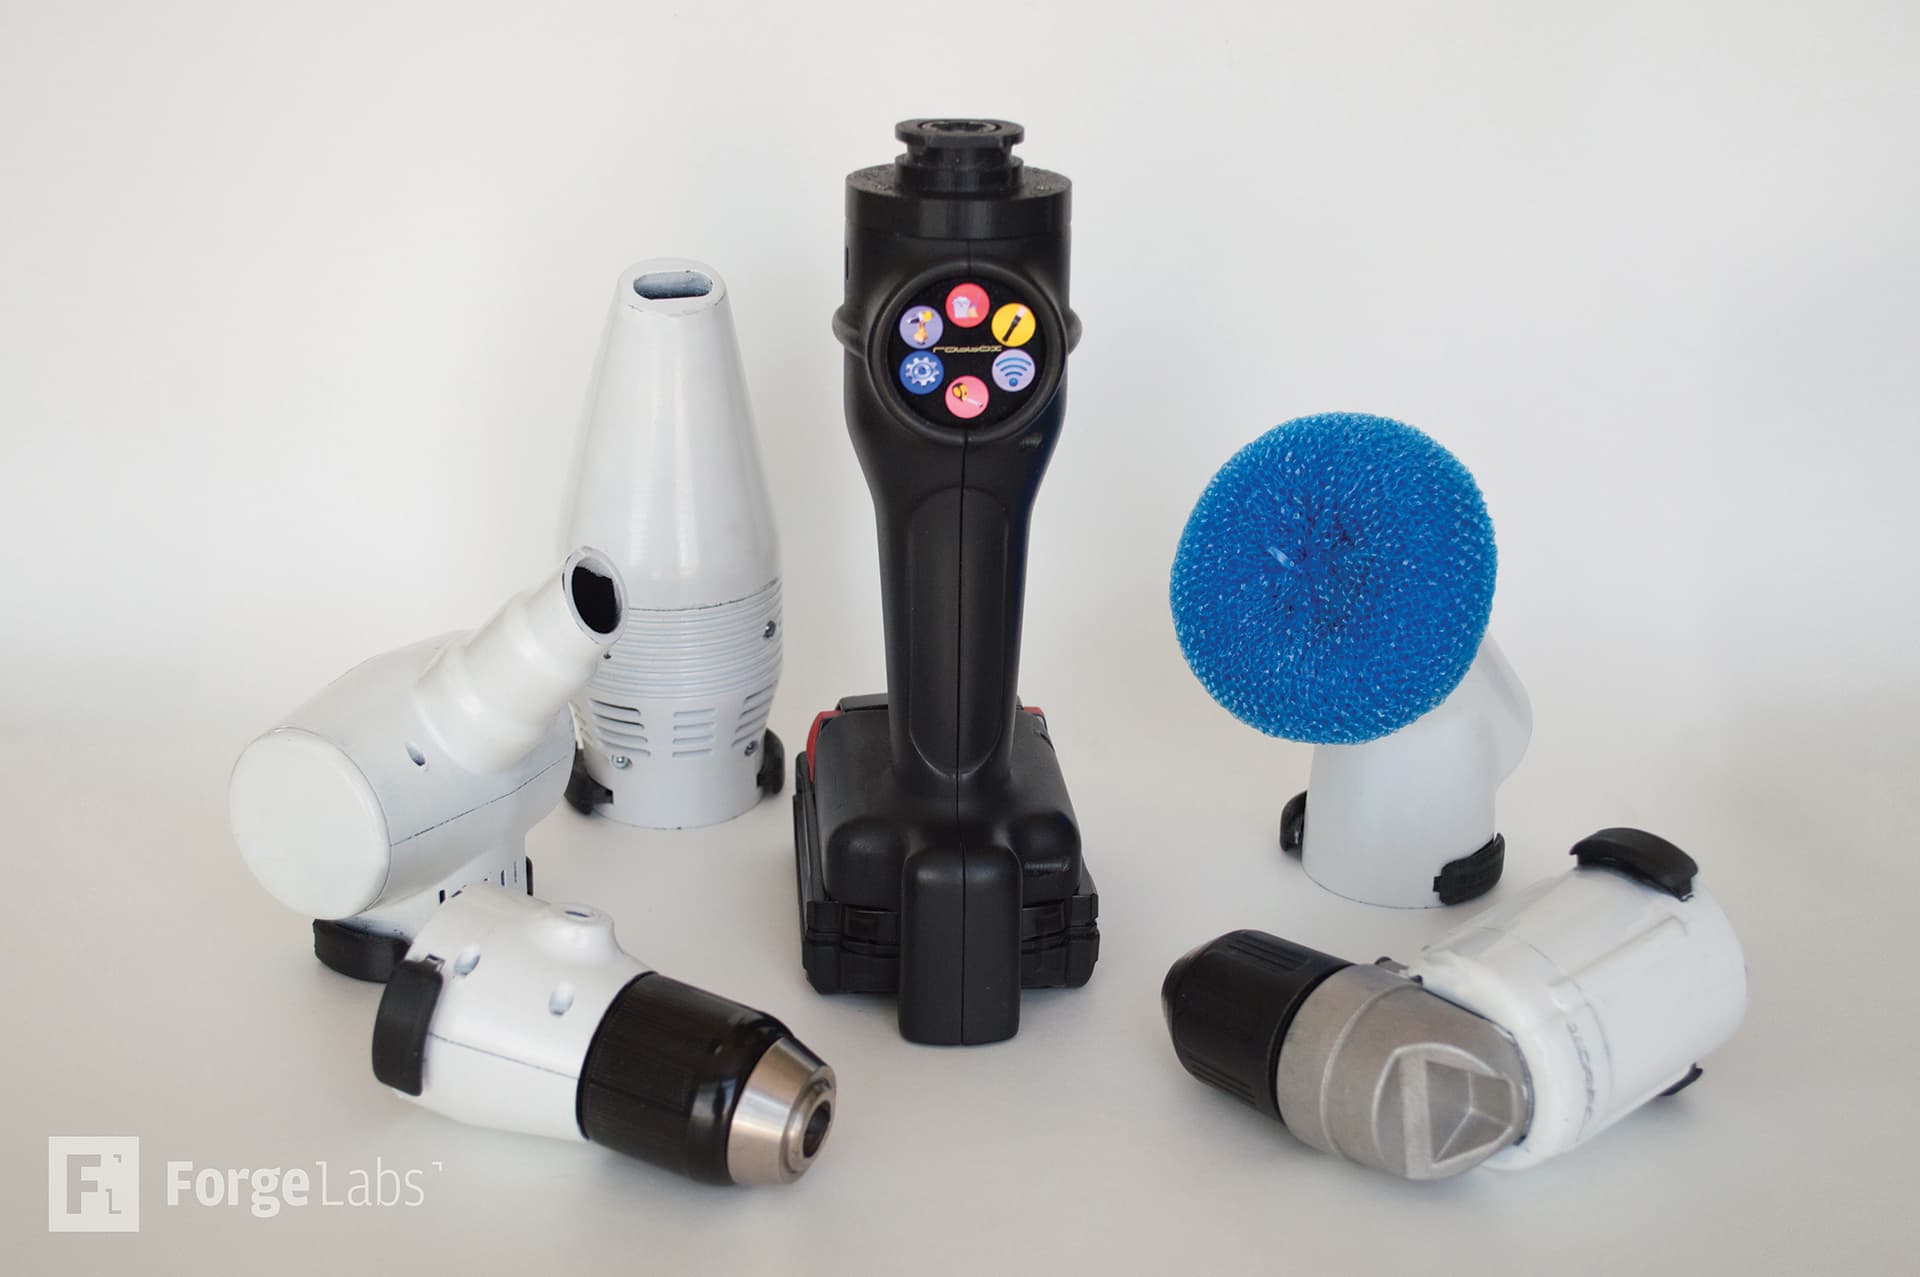
The driver extended this approach to a platform with swappable attachments. Each attachment introduced a different shape and task, while sharing a connection to the main tool. Robbox used ASA and ABS prints to develop these parts, with attachment iterations printed overnight on a Stratasys F170. That short cycle made a revised shape available for the next round of evaluation.
For any modular product, the common connection is worth resolving early. Its locating surfaces establish alignment; its retention features hold the attachment in place. Printing a representative pair lets a designer check how the parts engage, whether the joint has unwanted movement and how comfortably the attachment can be removed. Those checks inform the interface used by the other variants.
Clearance and surface finish work together here. A mating feature needs room for both printed parts' dimensional variation, and paint adds thickness to the finished surface. Small fit samples can help refine the interface before another complete tool is made. Where an assembly will be opened repeatedly, metal threaded inserts can also give its fixing points a durable connection. These are useful choices to consider alongside the FDM design guidelines when developing a similar modular enclosure.
Take a Working Prototype Into a Product Demonstration
Robbox's prototypes also needed to communicate the intended product. Once the designs were settled, printed parts were primed and painted for trade shows and demonstrations. The enclosure could carry the shape, colour and appearance of the product while the team continued its wider development work.
Finishing is most effective when it follows the purpose of the sample. On a grip or visible cover, sanding and filling reduce the FDM layer texture before primer and colour coats are applied. Keeping mating rims, locating features and fastener seats protected preserves the assembly fit. A close-fitting joint may need a finishing allowance in the CAD model so the painted components still come together cleanly.
For an early assembly check, leaving the surface close to its printed condition keeps the turnaround short and makes the geometry easy to examine. For a demonstration, more finishing effort can concentrate on the surfaces the audience sees and handles. Planning these priorities makes it possible to get different kinds of value from the same printing process.
What the Work EnabledMove From a CAD Model to a Tool People Can Evaluate
The work gave Robbox enclosure prototypes it could assemble and revise, along with finished models for presenting the tools. Its drill and driver prototypes went on to win a Pinnacle Innovation Award at the National Hardware Show in Las Vegas. Forge's contribution was the FDM prototyping that helped bring those developing designs into physical form.
For another team developing handheld equipment, the practical lesson is to bring the complete assembly into the prototype early. Grip, internal space, fixing points and the finish all affect one another. Printing them together makes those decisions easier to evaluate while changes are still straightforward to manufacture.
Developing an Enclosure or Handheld Product?
We can review the shell, mating features and material options, then plan the prototype around the fit checks and presentation finish you need.
Discuss your prototype